
🌿 Maintenance Guide for Self Care Clients
Your Prairie. Your Legacy. Your Hands.
✨ Introduction: You’ve Got This
If you're reading this, you've already taken the most important step—committing to something beautiful and lasting. Now that your prairie has been professionally seeded and prepared, the rest is surprisingly simple. Most people imagine prairie maintenance as back-breaking work, but the reality is far gentler. With just a bit of attention—especially in the first year—you’ll set the stage for a thriving, low-maintenance ecosystem that practically takes care of itself.
Think of it like this: an ounce of prevention is worth a pound of cure. By following this guide, you're giving your prairie the strong start it needs to flourish for decades to come. And don’t worry—you’re not alone. We’ve included helpful tips, tools, and resources to guide you every step of the way.
🌱 YEAR 1: LAYING THE FOUNDATION
1. Watering
Start watering when daytime temperatures consistently reach the 50s and you begin to see signs of green growth.
This typically occurs in late March to mid-April, depending on the weather.Guidelines:
When to Begin:
For spring plantings, begin watering immediately after seeding, following your installation date.
For fall plantings, wait until early spring, when soil temps warm up and germination naturally begins (typically when daily highs reach ~50°F).
Visual cue: When you notice tiny green shoots or seedlings emerging—that's your sign to begin regular watering.
Frequency: Water 2–3 times per week during dry weeks in the first 6–8 weeks of active growth.
Amount: Keep the top 1–2 inches of soil consistently moist but not soggy.
Best Time of Day: Early morning is ideal to reduce evaporation and fungal risks.
2. Weeding
👀 What’s a Weed, What’s Not
We get it—it's tough to know what to pull when everything looks like a baby plant. Here's what to expect and how to approach it without stress:
🌿 Set Your Expectations
Native plants grow slow. Weeds grow fast.
It will look patchy and messy at first—that's normal.
You don’t need to identify every plant to succeed.
Think of your prairie like a symphony. The weeds show up early and loud, but the real performers take time to arrive.
✅ The “Wait, Watch, Then Weed” Rule
Weeks 1–4 Water. Don’t weed yet—everything’s too small to ID.
Weeks 5–8 Begin observing. Only pull obvious invaders like thistle or crabgrass. When in doubt, leave it.
Week 9+ Begin gentle weeding once seedlings are 4–6" tall. Focus on fast-spreaders or plants you recognize as weeds.
Unsure if it’s a weed or a native? Scroll down to our Common Weeds in Pictures, or send us a photo—we’re here to help you figure it out.
🧠 Signs It Might Be a Weed:
It’s much taller or faster-growing than nearby plants.
It has spines, thorns, or is vining aggressively.
It looks like something you’ve pulled from your lawn before.
3. Monitoring Growth
Germination Timeline: Expect patchy growth and slow starts. Most native plants take 4–6 weeks (or more) to sprout.
Tip: Take monthly photos from the same angle to track progress and encourage yourself with visible results.
4. Cutting (Instead of Mowing)
Timing: Begin trimming once growth reaches 12 inches tall. Cut to 6–8 inches.
Frequency: 2–3 trims during the first year—typically mid-summer and early fall.
Recommended Tools: Use a hedge trimmer or a scythe. These tools allow for precise, low-impact trimming that won’t damage tender native plants.
Why This Matters: Cutting reduces competition from weeds and encourages natives to grow deep, resilient roots.
🌾 YEAR 2: BUILDING RESILIENCE
1. Weeding
Continue monthly inspections. The need will decrease over time, but staying ahead of invasives is key.
Prioritize removing any plants that are fast-spreading, especially if they weren’t part of your original seed mix.
2. Watering
Generally Not Needed: By Year 2, native plants typically establish deep root systems and require little to no watering—unless there’s a prolonged drought.
3. Cutting
Early Spring Cut: Before new growth begins (March/April), cut down last year’s stalks to 6–8 inches using a hedge trimmer or scythe.
Optional Late Summer Cut: If weeds appear or growth becomes too dense, a second trim can refresh the landscape.
Clean Up: Rake and remove debris to give new seedlings light and space to thrive.
4. Enjoy and Observe
Note what's growing well, what blooms when, and which birds or pollinators are showing up.
By late Year 2, your prairie should begin to feel full, intentional, and self-sustaining.
🧰 Tools & Resources
Hose and sprinkler or irrigation timer
Hedge trimmer or scythe
Garden gloves and hand tools
Lawn waste bags or compost bin
Native plant ID app or guidebook
🛠 Final Thoughts
Every prairie looks a little messy in the beginning—that’s normal. Trust the process, stay curious, and keep showing up. You’ve already done the hard part by choosing something bold and beautiful. Now, just nurture it a little… and watch nature do the rest.
What to Watch For: Common Weeds in Pictures
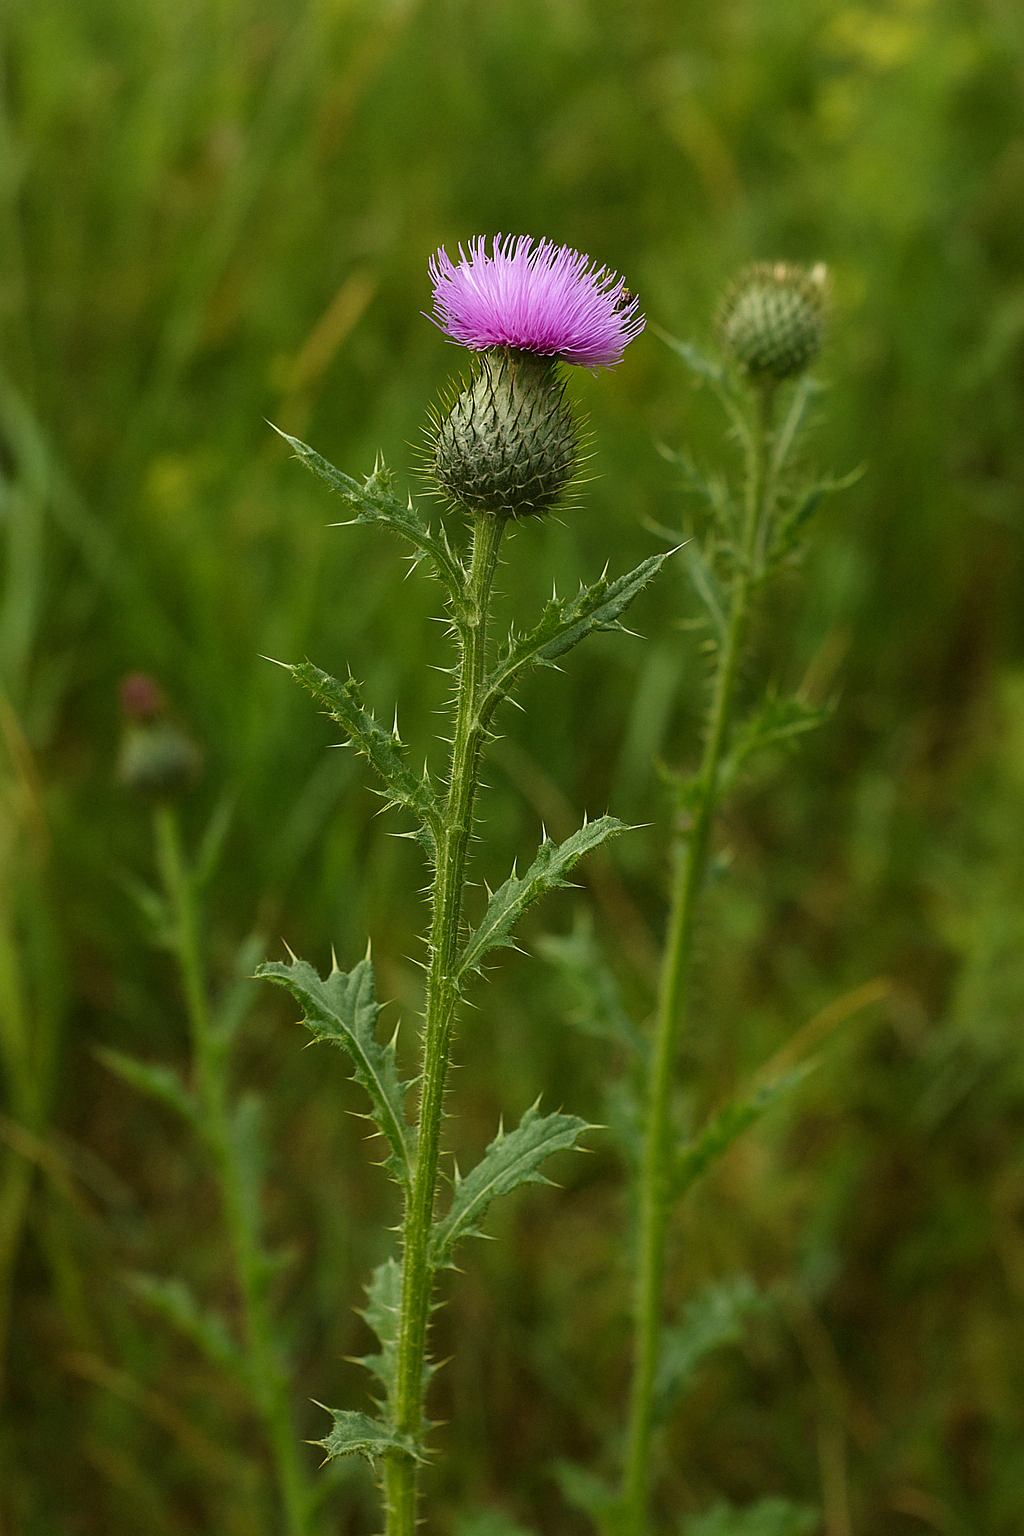
Canada Thistle (Cirsium arvense)
What to Look For:
Deeply lobed, spiny leaves with a rough, prickly texture. Stems are hairless and slender with spines running up the sides. Produces small, purple, thistle-like flower heads in late summer. Spreads aggressively through underground runners (rhizomes), often forming dense colonies.
How to Remove:
Persistent removal is key. Hand-pull small or young plants, ensuring you get as much root as possible. For larger infestations, cut repeatedly during the growing season to exhaust root reserves. Spot-treat with targeted herbicide in late summer or early fall for best long-term control.

Curly Dock (Rumex crispus)
What to Look For:
Long, wavy-edged leaves forming a basal rosette. Leaves often have a reddish tinge on the stem or edges. In its mature stage, it sends up a tall flower stalk with dense clusters of rusty-brown seed heads. Found in disturbed soil, especially low-lying or moist areas.
How to Remove:
Use a hand tool to dig out the deep taproot—pulling alone often leaves the root behind, allowing regrowth. Remove plants before they go to seed. In larger patches, repeat removal over time and encourage thick native cover to outcompete it.

Foxtail Barley (Hordeum jubatum)
What to Look For:
Feathery, soft-looking seed heads that resemble a fox’s tail—usually pale green to silvery-white. Grows in dense patches, often in disturbed or compacted soils. The long, barbed awns can be irritating to pets and livestock.
How to Remove:
Mow or trim before seed heads mature to prevent reseeding. Hand-pull small clumps in early spring while soil is moist. Improve soil health and thicken native cover to crowd it out over time.

Kentucky Bluegrass (Poa pratensis)
What to Look For:
A fine-textured, cool-season grass with narrow, boat-shaped leaf tips and a deep green color. It spreads by underground rhizomes, forming dense mats that can choke out native seedlings. Produces loose, pyramidal seed heads in late spring to early summer. Commonly escapes from nearby lawns into prairie restorations.
How to Remove:
Spot-treat patches with targeted grass-specific herbicides, especially early in the season before seed heads develop. Repeated cutting at a low height can also suppress regrowth. Encourage thick native cover to outcompete it over time. Avoid over-watering, which favors bluegrass dominance.

Crabgrass (Digitaria sanguinalis and Digitaria ischaemum)
What to Look For:
A low-growing, clump-forming annual grass with wide, flat blades that spread outward like a starburst. Often appears in bare or compacted areas. As it matures, it develops finger-like seed heads atop tall stems. Leaves have a coarse texture and a prominent mid-vein.
How to Remove:
Pull or hoe before it flowers and goes to seed—ideally while the soil is moist. For larger areas, shallow tilling or smothering with mulch can reduce germination. In future seasons, maintaining thick native cover will crowd it out. Pre-emergent treatments can help if timed correctly in early spring.

Common Ragweed (Ambrosia artemisiifolia)
What to Look For:
Finely divided, fern-like leaves with a rough texture. Plants often appear in disturbed soil and grow rapidly, sometimes reaching several feet in height. Greenish, inconspicuous flower spikes form at the top of the plant and are heavy pollen producers (a common allergy trigger).
How to Remove:
Hand-pull young plants before they flower and go to seed. Best done after rain when the soil is soft. For large patches, cut low to the ground multiple times throughout the season. Avoid disturbing bare soil where ragweed thrives—dense native cover helps suppress it.

Field Bindweed (Convolvulus arvensis)
What to Look For:
A low-growing, vining plant with arrow-shaped leaves and white to pale pink funnel-shaped flowers (about the size of a dime). Stems twist and sprawl across the soil surface or climb up nearby plants. Common in dry, compacted areas and known for its deep, persistent roots.
How to Remove:
Pulling is rarely enough—bindweed regrows from deep root fragments. For small patches, repeatedly dig out as much root as possible. For larger areas, smother with mulch or tarp, and spot-treat with targeted herbicide when needed. Long-term control requires patience and persistence.